pug の mixin を試してみた
pug の mixin を試してみた
pug を使った開発の際に、
include 先に変数(短いテキストなど)を渡していた。
いろいろ変更していると、html(div で囲んだものなど)も渡したくなったので試してみた。
Layout ファイル
block
block contentのようにblockを宣言できる- 下記のように宣言することによって、継承した先で、
contentの中身を自由に変更できる
- 下記のように宣言することによって、継承した先で、
p footer contentのようにブロックの中に書いた部分は初期値となる- ブロックの中身は、継承した先で変更できる
//- _layout.pug
html
head
title Sample
body
block content
block footer
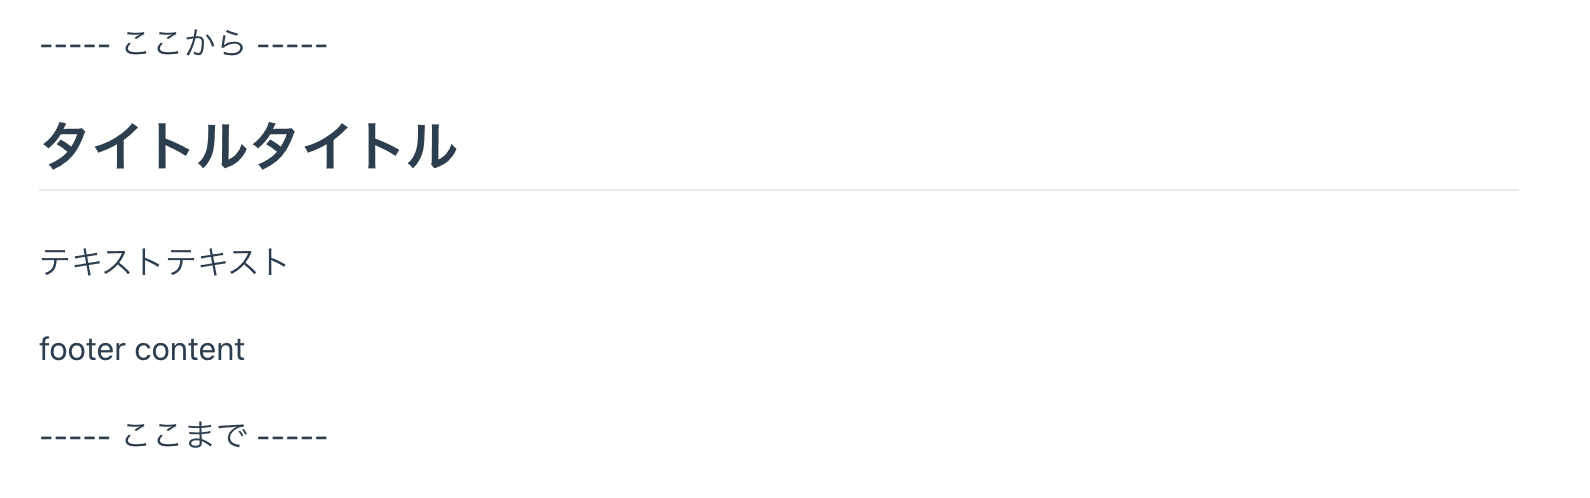
p footer content
Layout ファイルを継承したファイル
extend
- 継承
extend _layout.pugのように書くと、ファイルを継承できる_layout.pugでcontentのようなブロック名を宣言しておくと、extendしたファイルで、blockの中身をいじれる
include
- 共通の部分を作れる
- 作ったファイルを読み込んで、好きな場所で表示することができる
- 複数ページで同じ内容を表示する場合に便利
mixin
- 今回のような複数ページで同じような内容を表示する場合に便利
+mixin名で呼べるmixin テスト('ほげほげ')みたいに宣言すれば、ほげほげのような値も渡せる
例 1
//- content1.pug

extend _layout.pug

mixin contentTxt
  h2 タイトルタイトル
  p テキストテキスト

block content
  include includes/_content.pug
例 2
//- content2.pug
extend _layout.pug
mixin contentTxt
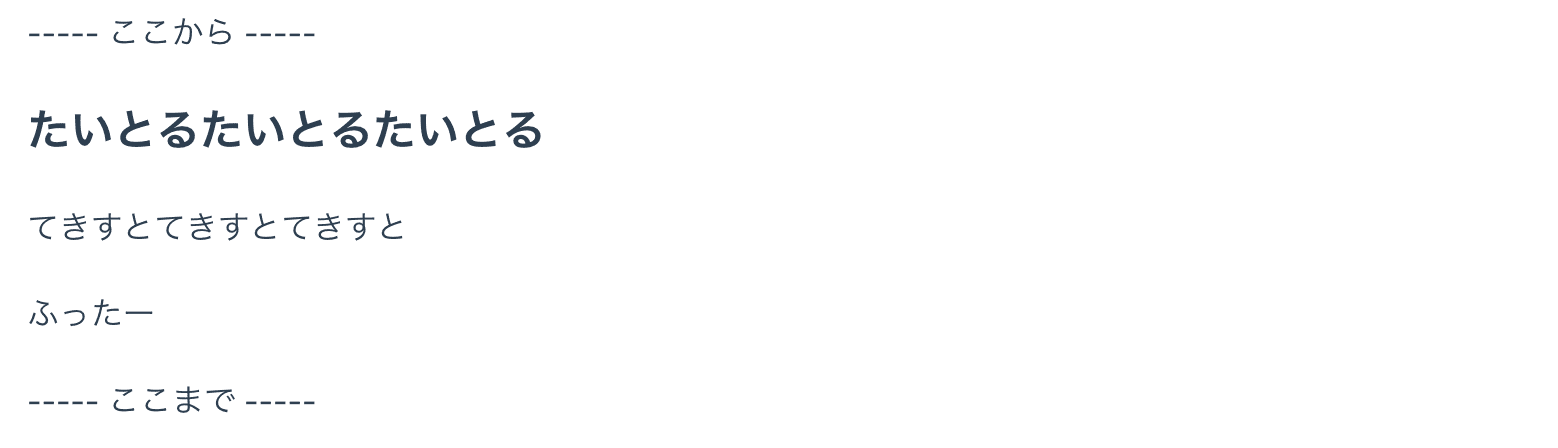
h3 たいとるたいとるたいとる
p てきすとてきすとてきすと
block content
include includes/_content.pug
block footer
p ふったー
include されるファイル
includeされるファイルは、includesディレクトリに入れておくのが一般的mixin contentTxtは、+contentTxtで呼べる- 下記のように、
includeした先でも呼べる
//- includes/_content.pug

div
  +contentTxt
結果
content1.pug を呼んだ場合
<!-- Sample1.vue -->

<template lang="pug">
  div
    p ----- ここから -----
    include content1.pug
    p ----- ここまで -----
</template>
content2.pug を呼んだ場合
<!-- Sample2.vue -->

<template lang="pug">
  div
    p ----- ここから -----
    include content2.pug
    p ----- ここまで -----
</template>